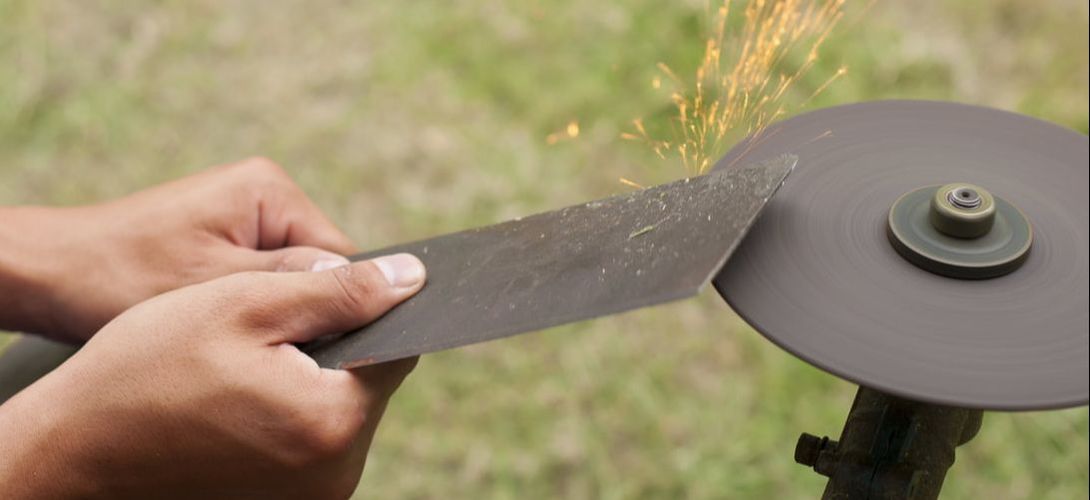
 With long-term usage, the spinning blades beneath your mower become ow dull. This can cause them to tear the grass, rather than to cut it smoothly. This gives your lawn a raggedy look as well as making it more vulnerable to disease. Unless your blade is very damaged, to sharpen your mower blade necessitates some elbow grease and a few fundamental tools.
Sharpening Your Blades Preparation 1. Disconnect the power source and spark plugs. A mower can cause serious harm if it starts while you are working on it. Always cut off the power before taking apart your mower. The spark plug can be disconnected by detaching a prominent wire on the front or side of the lawnmower engine from its metal mounting. Once separated, the engine shouldn’t be able to cut on. For safety reasons, it's recommended you wear eye protection and heavy gloves during this job even if you're sure the spark plug is disconnected and cut the power off. 2. Put the mower on its side with its carburetor facing upward. To get to the mower blades, it has to be on its side. Though, due to the location of the mower engine, flipping the mower over could make the engine oil run into the air filter and carburetor So this doesn’t happen, make sure you turn the mower so that these are facing upward instead of downward. The air filter and carburetor on most contemporary mowers are typically located in a boxy plastic case on the engine’s side. If you’re not sure where these parts are on your mower, check your owner's manual, call your manufacturer, or get in touch with a tree care company. As more protection against spilling, you can pour the oil into another container or operate the mower until it's out of gas. This task is also an excellent time to check your oil and change it if needed. It's suggested you change your oil every year. 3. Mark the side of the blade that is facing downward. A common mistake made when sharpening a mower blade is to put it back in upside-down. If this happens, the blade will not cut the grass, regardless of how sharp it is. To get out of the extra effort used in removing and installing the blade again, make a clear marking on the bottom side of the blade before taking it out to sharpen.  If you have a recently built house, you could have compacted soil in spots where you want to put a garden or landscape. Usually, topsoil is put around new construction areas and intended for future lawns. Though, underneath the layer of topsoil, there might be highly compacted soil. Read this article to learn how to know if your soil is compacted.
Identifying soil compaction in pastures is down by analyzing the symptoms of the root, soil, and tree. Measurements of soil strength help quantify restrictions and verify if other constraints like soil salinity or soil acidity are present. For an accurate analysis of your lawn and trees, contact an arborist. Soil Compaction Information Soil that is compacted doesn’t have the porous spaces for oxygen, nutrients, and water that trees require to live. Soil compaction is typically caused by urban development. Sometimes, though, it can be brought on by heavy, hard rains. Areas that have been trampled on by heavy equipment like hoes, tractors, trucks, farming equipment, construction equipment, combines, trucks, or backhoes will typically have compacted soil. Even areas that get plenty of foot traffic from animals or humans could have compacted soil. Knowing the area’s history can assist when verifying soil compaction. Is my soil too Compacted for Gardening? Some compacted soil signs:
In the early spring, you can test for soil compaction when moisture in the soil is at its peak. While there are pricey tools you can buy to check for compacted soil, these aren’t always worth the price. A strong, lengthy metal rod is what you truly need to determine if you have compacted soil. With a steady hand, push the rod into the space in question. The rod must go in a couple of feet in healthy, ordinary soil. If the rod won’t penetrate or only penetrates just little but then suddenly stops and can’t be pushed down anymore, you have soil compaction. 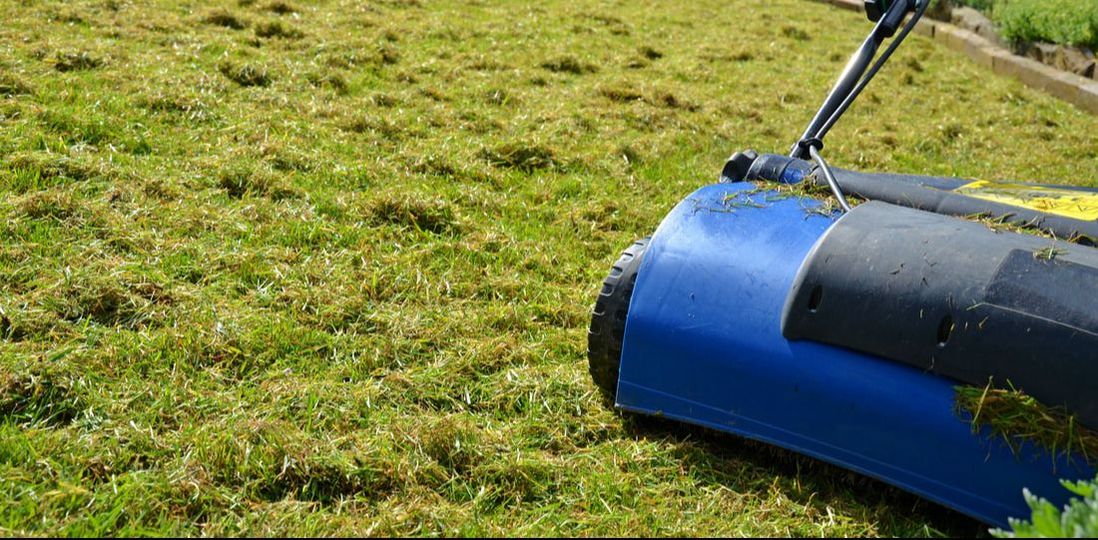 My lawn needs aeration? Why?
In the long run, your lawn could become compacted by heavy rains or just walking on it. The compacted surface stops air, water, and nutrients from getting to the tree’s roots. This is why there are many benefits of aerating your lawn. What is the best time to aerate? Aeration can be done at any point in the growing season. The number of times your lawn necessitates aerating depends on the soil compaction. The two most common times to aerate are fall and spring. Spring aeration offers grass plants with more boost and delivers faster greening. Fall aeration aids in toughening underground roots while providing an excellent bed for overseeding. Your tree service professional can tell if your lawn requires aerating and recommend the right time to get it done. How does an aerator work? There are many types of walk-behind and pull aerators in the industry. The most popular is core-type equipment that eliminates little plugs from the grass. Core aerators have access of 2 ½ inches and get rid of plugs from ¼ to ¾ inches in diameter. Spiky parts shove small tines into the turf without detaching soil plugs. A third type, slicing aerators, practically slices through the soil creating openings. What are some long-term and immediate benefits? Aeration quickly opens up the soil to water, nutrients, and air. The openings create better water movement and air penetration, giving roots room to stretch out and flourish, becoming dense and vigorous. Over time, aerated lawns are less predisposed to thatch buildup and diseases. In some instances, the process can even resolve small thatch issues. Moreover, aeration decreases water runoff and enhances turf tolerance to drought and heat. Aeration is a natural procedure that has no adverse side effects. Even the little plugs left behind by core-type aerators are valuable. In the process of breaking down, they put a light coating of top dressing that assists in decomposing thatch amassed at the base of the trees. Why is aeration needed? Aeration not only aids in reducing soil compaction, but it lets water get deep and in the root area. This helps microorganisms living in the soil. These organisms decompose current thatch, enriching soil quality and releasing more nutrients for healthy tree development.  Trees create their food by uniting carbon dioxide that they get from the air with water from the soil. This process is referred to as photosynthesis. To fuel this process, trees use the energy of sunlight. A pigment in the leaves, chlorophyll, capture the sun's energy. This is why tree sunlight is so important. Trees require sunlight to prosper and survive in any environment. Sunlight is one of the things that let trees grow in their particular ways of crafting their distinctive crown shapes that can vary from tree to tree even within the same tree type. The tree crown is made up of the branches and limbs that extend outward from the trunk of the tree. Without the right amount of access to this requirement, a tree could be less resistant to human and environmental stressors. The shape of the tree will be changed. What Do Trees Do With Sunlight? Trees use energy from the sun to make sugars through a procedure named photosynthesis. Without these sugars as a source of energy, a tree cannot survive or grow. Arborists have discovered that photosynthesis is impacted by the amount of sunlight that the leaves of a tree receive. Trees fight for sun exposure and some tree types will be shaded by others, making the shaded species to reduce photosynthesis rates because of less availability of tree sunlight. Studies have shown that photosynthetic methods have a considerable effect on what a tree crown will appear like. These studies discovered that leaves along the outer area of a tree crown receives more sun and are more significant. This distribution makes a layered effect in the tree crown making its unique shape. Having a reduction in photosynthetic methods can be hazardous to many structures of the tree causing the tree to shape change. Researchers analyzed productivity by the amount of sunlight a tree soaked up and then compared it to the size of the tree crown. As the volume and size of the crown grew, it further grew the amount of sunlight absorbed, guiding to a rise in photosynthetic methods which resulted in a stronger and healthier tree. 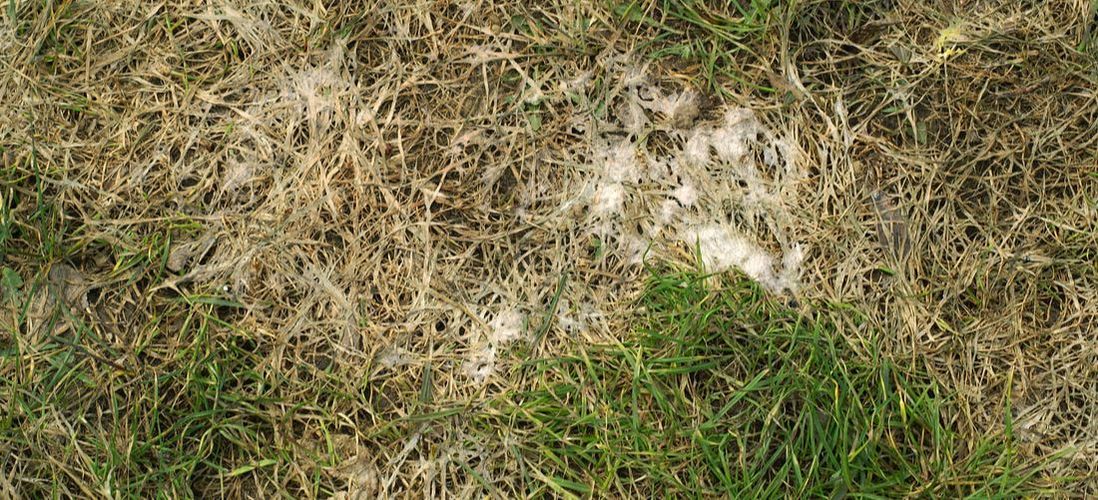 Snow mold is a cold-weather fungus that affects cool-season grasses. Learn what is snow mold and what you can do about fixing and preventing it. What Is Snow Mold? Most indicators of spring are the good ones, like bloom, warmer temps, green grass, and buds. But gray-colored circles on your grass? Not hardly. Snow mold is due to cold-weather fungi that typically affects cool-season grasses. Signs of an issue aren’t seen until the spring when the snow melts. Signs of Snow Mold Symptoms of both gray and pink snow mold are typically most noticeable in the spring when the snow starts to melt. As the snow melts, circular patches varying in size from a couple of inches to several feet appear in your lawn. The grass in these patches is generally crusty and matted down. The spots will have a white-grayish look if they are due to gray snow mold or a pink-whitish look when due to pink snow mold. Pink snow mold can be more hazardous than gray snow mold since it kills the roots and crown of grass plants. Gray snow only affect grass blades. How to Treat Snow Mold The key to fighting snow mold is prevention. There aren’t any treatments that work on snow mold when the snow melts in the spring. If you have repeated problems with snow mold in the springtime, you can use a preventative application of fungicide in fall before the first heavy snowfall. If you don't use a preventative fungicide in fall and you see snow mold damage in your yard, the first thing you should do is gently rake the affected spots to loosen the matted grass. This will aid the lawn in drying and giving unaffected grass space to grow. You can also reach out to a tree specialist to inspect your outdoor area. Once you’ve got your lawn back in order, it’s critical to maintain it in a way that deters snow mold in the winter. Keep mowing your grass until the growth has stopped altogether. Tall canopies make snow mold worse. Lastly, you should dethatch your lawn around late fall to eliminate as much build-up as possible before the snow begins. 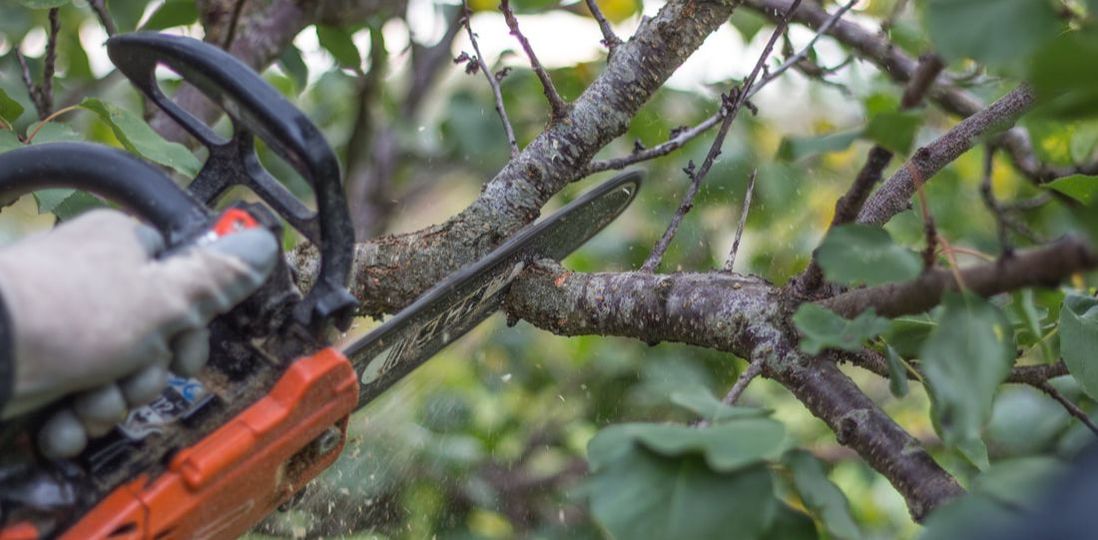 Trees need a specific amount of care to stay healthy. Along with sunlight and water, they need to be trimmed periodically. This trimming technique is also called “tree topping.” Tree topping is the ideal way to shape your trees and craft a beautiful outdoor area. Some trees can be trimmed into a specific pattern or shape to compliment your landscape. Along with the aesthetic benefits of topping trees, here are a few other reasons you should top your trees on a regular basis. Tree topping enhances the overall health of your tree. As your tree thrives, branches become hard and dry. Certain parts start to die. These damaged or diseased parts can take over the healthy parts of the tree, creating severe problems. To safeguard your trees’ health, it’s crucial to trim back these diseased branches. If you don't trim your tree, the disease can spread to the other trees in your outdoor area, and over time, destroy your trees. Tree topping reduces the possibility of health problems taking over and killing your trees and yard. It encourages the growth of young trees. When trees are young, they grow erratically. If left unexamined, these growths could make for an unappealing mature tree. Specific growth patterns could cause the tree not to grow. By topping your trees, you let them grow in a way that guarantees beauty and health. However, topping young trees isn’t a simple job. If too many limbs are trimmed, it could affect its structural integrity and create other serious problems. Make sure that you hire a business that specializes in tree trimming services to perform the trimming of your young tree to make sure that it thrives as it should and flourishes into a beautiful tree. Tree topping keeps your home and family secure. When the heavy winds kick in, your trees become hazardous. If your trees haven’t been topped, dead branches will most likely break off. This creates a safety risk for your property and family as they could fall and create deadly results. Getting your trees trimmed periodically guarantees that any hazardous branches are gone before they have the chance to cause any damage. There are lots of benefits of topping trees. While you might want to trim your trees yourself, contacting an arborist is a better choice. 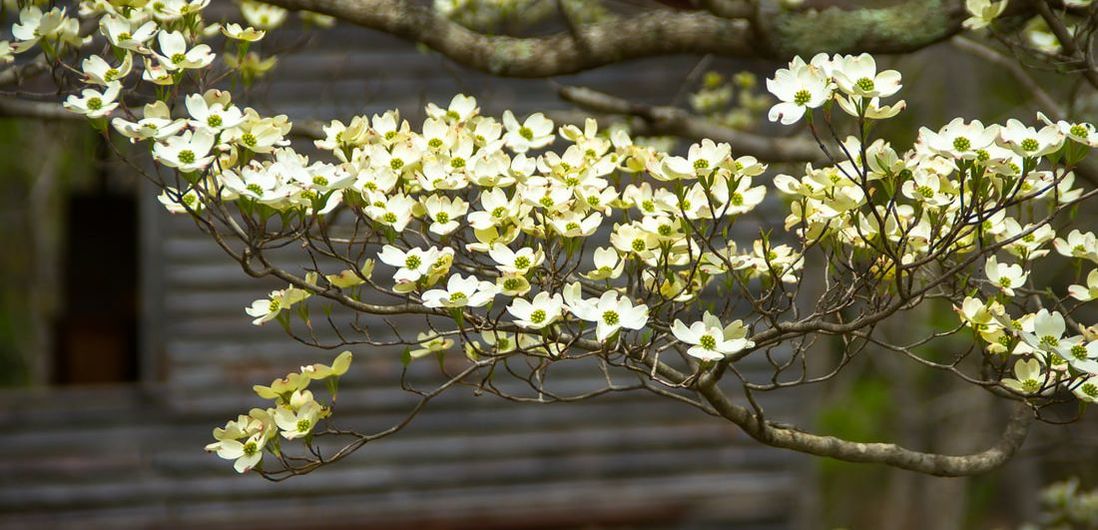 When putting flowering trees to your yard, plant them in beds. They look great in the landscape when flourishing in groves or clusters or groves, much more than individual trees. There are also many benefits of groupings. For instance, in poor soils, roots grow quickly in the bed. You can fertilize and water the whole group together, and the issue of trimming or mowing around the trunks is gone, saving time and eliminating damage to the bark. If you are looking to plant flowering trees, some of the best choices would be Dogwoods, Tulip Poplars, Crape Myrtles, and Royal Empress Paulownias. For more information on the best flowering trees to plant in your outdoor space, contact a Syracuse tree care company. Like all other living things, these trees require year-round care, ample water supply, right temperature conditions, and good soil quality. All of these factors play a part in the health of your flowering trees. Flowering Trees: What You Need to Know One thing to think about when planting your trees is to plant them in a bed so less harm can be caused to the trunk by weed eaters or lawn mowers. Less weeding will need to happen if you put a couple of inches of mulch to the bed. The mulch also helps to sustain moisture for your trees. Wisely think about how deep to plant before digging the hole for your new flowering trees. You should create the hole twice as wide, but no deeper than the root ball. The gap must be massive enough for the roots to grow. Put the trees in the hole and water the root ball before you start to fill the gap with topsoil. Refill the hole ensuring the root ball is level or just under the surface. After you plant the trees, use a root-growing fertilizer to aid with root expansion. Put some on the topsoil and water a little. Put a couple more inches of mulch around the trees and water, as usual, about one inch of water every week. Stake the trees for approximately one growing season to create stability. Plant under your trees with ground covers if you don't want a whole lot of mulch underneath. Groundcovers are used as a carpet of greenery and hinder root competition and mowing complications that can plague trees planted in the soil. 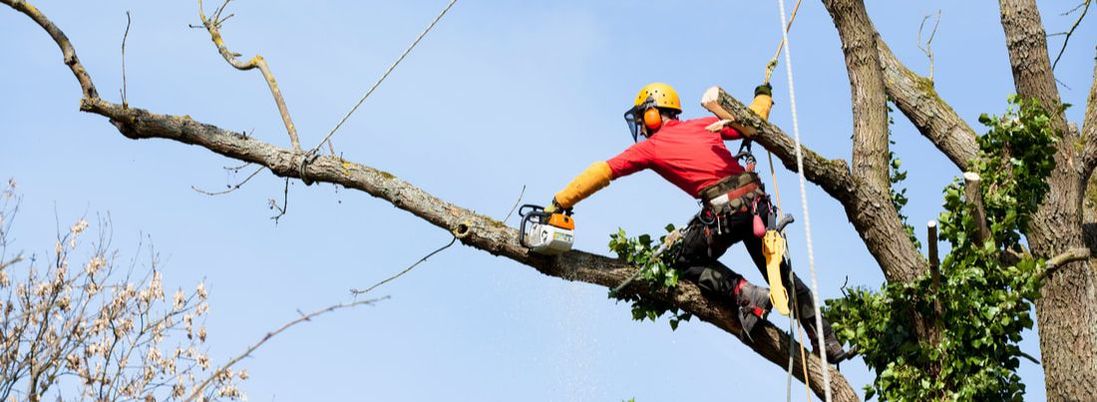 Taking down a tree is something that should be left to the tree care professionals. If the tree that you want to get rid of is small and short, you might handle it yourself. Although, we recommend calling a business that provides tree service in Syracuse. Whether a small or big tree, safety must come first at all times. There are too many stories of tree cutting gone bad. It's suggested you hire a professional tree removal business to cut down a tree for you. Before doing so, you should school yourself about necessary tree cutting costs. The price to cut down a tree differs on a host of factors. You can spend as little as $100, or you could wind up spending over $2, 000 or more. Tree cutting is best left to an arborist who has more experience. Tree cutting accidents usually occur when people attempt DIY, resulting in tree cutting gone bad. Below are the most common tree cutting accidents.
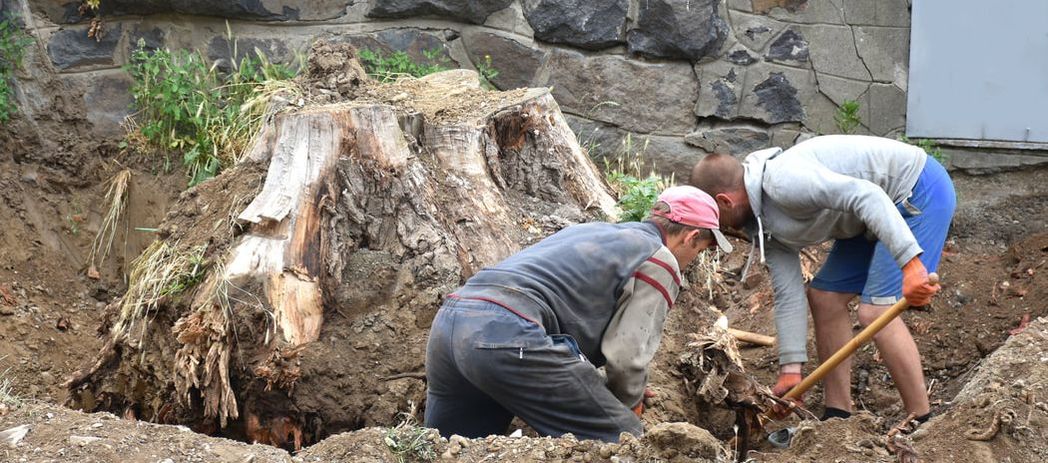 Tree removal services leave your yard tidy and clear, often resolving a persistent issue and enhancing the area. But removing an old stump also offers a chance to make something new in your outdoor space. What do you do when planting after tree removal? How do you plant a new tree after removing the stump and what sort of conditions should you avoid? Get your landscape looking great with the following tips. Soil Stump grinding produces a good amount of wood chips and sawdust. Even though this natural material breaks down over time and puts vital nutrients in the soil, eliminating some of it and equalizing the mixture with new soil aids in providing right growing conditions for your new tree. You might want to use the ground wood as mulch in other spots in your landscape. Roots Roots stay even after the grinder has turned the stump into sawdust. This can be a real obstruction to the growth of a new tree. Some arborists recommend planting a new tree no sooner than 12 months after removing an established tree. Although, some property owners might want to sift through the surrounding soil to get rid of the majority of the roots. Dig up around the area you want to plant the tree and examine the conditions. If the roots take up more room than the healthy soil, wait 12 months or more for decomposition. Size Shop for trees considerably smaller than the eliminated stump to give lots of room for growth. This provides some beauty with and greenery without giving up the tree’s health and allowing for a lush, green landscape later on. Talk to a tree specialist about tree types that will flourish in your yard and inquire about younger trees. With some shopping and planning, you can enjoy planting after tree removal. To replant another tree in that location, you have to eliminate as much of the sawdust and roots from the original tree as possible to give a rich growing environment for a new tree. This could mean using an ax to chop out all the old roots, so the new tree has plenty of root room to grow. 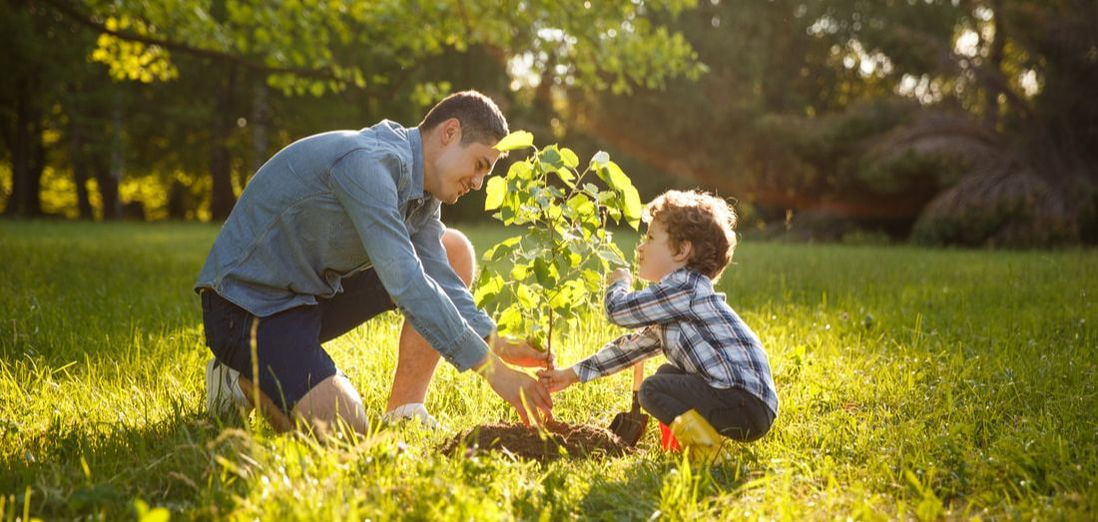 There are times in your life when it occurs to you that breaking a rule or two isn’t bad. One such time is the long-held thought that planting trees in summer is a bad idea. The practice has always been to plant trees in fall and spring when the weather is cooler. While fall and spring are great times of the year to plant trees, we believe that summer is just as good any. We don’t suggest digging and dividing your collection of hosta or transplanting the antique rose bush handed down through generations. But you can plant new trees in the heat of the summer. Any jolt to a plant when planting a tree in a pot is gone since you didn’t dig up the tree or even mess with the roots when cautiously taking it out of the container. Summer heat could bring some stress to new plants. But, with some extra care on your part, it will aid the plant in producing a healthy root system and practically ensure successfully enduring its first winter because of excess root growth. Is Planting Trees in Summer That Bad? The answer is of course not. As long as you take the right care of your treasured foliage, they will do just fine. Don’t forget that since it is summer planting, you have to water them a lot! The trick is water it enough without overwatering it. If you overwater it, you create a whole list of issues, and you don’t want that. If you can, try to pick a week with days that will stay under 90 degrees for top results. When it comes to mulch, use it! Stay away from dyed mulch, but any other mulch will work well. Your goal is to keep the roots as cool as you can. Plus, mulch looks good in any landscape. Call a tree service business for stump grinding and mulch. Mulch aids in holding in moisture and sustaining soil temps, as well as keeping away pesky weeds that rob the nutrients and moisture from your tree. Last but not least, you should keep the mulch a few inches from the trunk of your tree to avoid pest issues and diseases associated with this typical tree planting mistake. |
AuthorWe at Syracuse Tree Service want to help you with your tree service needs, our blog is where we provide helpful tips and ideas for the health of your trees. Archives
December 2020
Categories
All
|

- Home
- Services
- About
- Contact
-
Service Locations
- Liverpool Tree Service
- North Syracuse Tree Service
- Cicero Tree Service
- Baldwinsville Tree Service
- Manlius Tree Service
- Weedsport Tree Service
- Clay Tree Service
- Bridgeport Tree Service
- Lafayette Tree Service
- Fayetteville Tree Service
- Chittenango Tree Service
- Camillus Tree Service
- Onondaga Tree Service
- East Syracuse Tree Service
- Blog
 RSS Feed
|
Home | Services | About Us | Contact Us
Liverpool | North Syracuse | Cicero | Baldwinsville | Manilus | Weedsport | Clay | Bridgeport | Lafayette | Fayetteville | Chittenango | Camillus | Onondaga | East Syracuse © Syracuse Tree Care 2017
Syracuse Tree Care 4736 Onondaga Blvd Suite 112 Syracuse, NY 13219 (315) 692-0186 |
|